ERC-1155
Overview
Pros
- Allows for the creation of multiple types of tokens within a single contract.
- Supports both fungible and non-fungible tokens.
- More efficient and cost-effective for creating a wide range of NFTs.
Cons
- Relatively new and complex standard.
- Limited support from Ethereum wallets and exchanges.
- Requires advanced development skills to implement.
🏁 Prerequisites
Tutorial
1. Write your ERC-1155 contract
We’ll use a contract based on the OpenZeppelin library’s ERC-1155 implementation.
a) First, install the Open Zeppelin library in order to inherit its classes:
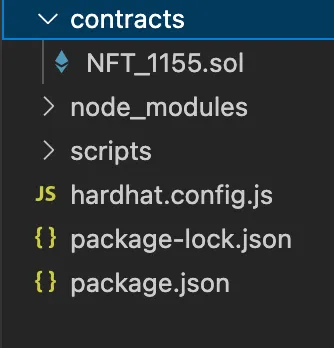
npm install @openzeppelin/contractsb) Next, create a file named NFT_1155.sol under the contracts folder.

c) Lastly, add the following smart contract to NFT_1155.sol file.
// SPDX-License-Identifier: MITpragma solidity 0.8.17;
import "@openzeppelin/contracts/token/ERC1155/ERC1155.sol";
contract NFT_1155 is ERC1155 {    constructor(string memory uri) ERC1155(uri) {}}
2. Install Hardhat Deploy
npm install -D hardhat-deploy3. Install an Ethereum library
In this example, we will use Ether.js
npm install --save-dev @nomiclabs/hardhat-ethers ethers@^5.0.04. Set environment variables with dotenv
- Install
dotenv
npm install --save dotenv- Create a
.gitignorefile
A great example of a Solidity .gitignore file can be found here

- Create an
.envfile n your project’s root folder, and set environment variables in the file as follows
PRIVATE_KEY = #The private key of the account you intend to use on the Palm network INFURA_API_KEY = #Your Infura API key

5. Edit hardhat.config.js with the following text:
- You can add additional supported fields on the
hardhat.config.jsfile.
require("dotenv").config()require("@nomiclabs/hardhat-ethers")require("hardhat-deploy")
const key = '';
module.exports = {  solidity: "0.8.17",  settings: {    optimizer: {      enabled: true,      runs: 1000000,    },  },  mocha: {    timeout: 90000,  },  networks: {    hardhat: {      initialBaseFeePerGas: 0,      blockGasLimit: 18800000,    },    palm_testnet: {      url: `https://palm-testnet.infura.io/v3/${process.env.INFURA_API_KEY}`,      accounts: [`0x` + process.env.PRIVATE_KEY],      gasPrice: 1000,      saveDeployments: true,      deploy: ["scripts/"],    },    palm_mainnet: {      url: `https://palm-mainnet.infura.io/v3/${process.env.INFURA_API_KEY}`,      accounts: [`0x` + process.env.PRIVATE_KEY],      gasPrice: 1000,      saveDeployments: true,      deploy: ["scripts/"],    },  },  namedAccounts: {    deployer: 0  },}
6. Compile your Contract
To make sure everything is working so far, let’s compile our contract:
npx hardhat compileDownloading compiler 0.8.6Compiled 13 Solidity files successfully7. Write a deploy script
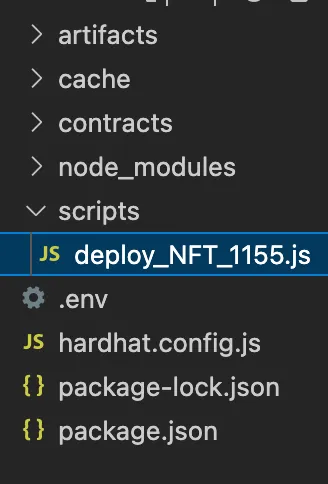
a) Navigate to the scripts folder and create a new file called deploy_NFT_1155.js

b) Add the below code
module.exports = async ({    getNamedAccounts,    deployments,    }) => {    const {deploy} = deployments;    const {deployer} = await getNamedAccounts();
    console.log("Contract deployed to address:", deployer);
    // Deploy "NFT" if the contract was never deployed or if the code has changed since the last deployment     await deploy('NFT_1155', {        from: deployer,        gasLimit: 4000000,        args: ["https://NFT1155/{id}.json"],        log: true    });};
8. Deploy to the target Palm network environment
npx hardhat --network palm_testnet deploynpx hardhat --network palm_mainnet deployContract deployed to address: 0xF92d8201C320cB952fE551b1Ec9e7AD063a3649ddeploying "NFT_1155" (tx: 0x6cfa6f69e677f7e9469e99248a5840bfb09eed760761859fa56826285ed8b2d9)...:deployed at 0x7A008FB06a9Fdf3c813e1df9058Ef841f184bCaA with 2130231 gas-
The task will execute the scripts in the
scriptsfolder and saves the contract deployments to disk. Each deployment is saved into the deployments folder for the specific network.
9. Look Up Your Deployment on the Palm Network Block Explorer
| Testnet | Mainnet | |
|---|---|---|
| Explorer URL | https://testnet.palm.chainlens.com/ | https://palm.chainlens.com/ |
Paste your contract address into the search bar.
You will see something like this upon successful deployment 👇

10. Verify via Sourcify
npx hardhat --network palm_testnet sourcifynpx hardhat --network palm_mainnet sourcifyverifying NFT_1155 (0x7A008FB06a9Fdf3c813e1df9058Ef841f184bCaA on chain 11297108099) ... => contract NFT_1155 is now verifiedNext Step 👉 Mint your NFT
Using the Smart Contract you just deployed you can now Mint NFTs with Hardhat