Mint NFTs with Hardhat
Overview
This guide walks you through using Hardhat to deploy an NFT smart contract to the Palm network.
🏁 Prerequisites
- Get PALM Tokens to pay the deployment transaction fees.
- Connect to Palm network
- Set up MetaMask wallet.
- Install Node.js.
**Tutorial | Mint NFTs using Hardhat **
1. Create a mint.js file in your scripts folder
Inside your scripts directory, create a mint.js file.
We will use the Hardhat-flavored version of the ethers.js library. This provides more abstractions and leaner code than web3.js.
Require the correct libraries:
let provider = ethers.provider;2. Create a variable representing your contract’s ABI
Our contract’s ABI (Application Binary Interface) is the interface enabling our JavaScript to interact with our smart contract. Hardhat generates and stores the ABI version of our contract in the artifacts folder as a JSON file.
Add the following to mint.js:
let provider = ethers.provider;3. Add a provider
In Ethers.js parlance, a provider represents a connection to an Ethereum blockchain. Adding one will enable your app to interact with the Palm network.
In this scenario, because we’re using the Hardhat plugin version of Ethers.js, our ethers.provider object retrieves all the connection details from hardhat.config.js.
Add this line to mint.js:
let provider = ethers.provider;4. Upload a media file to IPFS
This step consists of adding a media file of your choice to IPFS which is a distributed system for storing and accessing files, websites, applications, and data.
In order to help ensure this file’s availability, you can “pin” the file in IPFS. There are several pinning services available that will maintain your file on IPFS:
Example Using NFT Storage
a) Log into NFT Storage and create an account
b) Upload your file

c) Save its CID (the content identifier for a file or piece of data)

5. Create your NFT’s Metadata file
In this example we will implement the ERC721 Metadata JSON Schema.
a) In the root directory, create a new file called nft-metadata.json
b) Edit the following JSON code to match your NFT’s specifications
c) Add the CID of the image you saved in Step 4.
d) Upload nft-metadata.json to NFT Storage
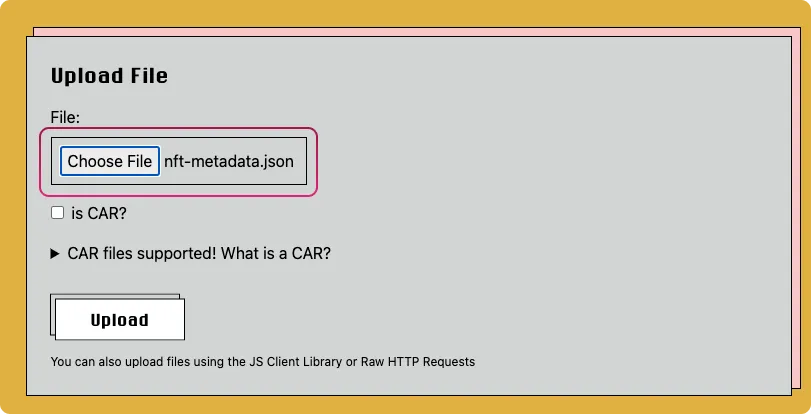
e) Copy its CID

f) Add this line to mint.js file
const tokenCID = "<CID-of-your-JSON>";The variable tokenCID will be passed as an argument to the contract’s mintNFT function.
6. Update your .env file:
a) Add your public key to a PUBLIC_KEY variable in your .env file:
PUBLIC_KEY = "your-public-wallet-account-address"
b) Get the address of the contract you deployed earlier from Using Hardhat, the address returned by Hardhat upon deployment, and create a .env variable pointing to that address:
CONTRACT_ADDRESS="deployed-contract-address"Your .env file should now contain the following variables:
API_URL="your-provider-api-url"PRIVATE_KEY="your-private-account-address"PUBLIC_KEY="your-public-wallet-account-address"CONTRACT_ADDRESS="deployed-contract-address"7. Set up the Ethers.js signer and wallet
The wallet is a convenient class in Ethers.js, it represents an Ethereum account and enables one to sign transactions and messages like an EOA (Externally-owned account) would.
Add the following to mint.js:
const privateKey = `0x${process.env.PRIVATE_KEY}`;const wallet = new ethers.Wallet(privateKey);wallet.provider = provider;const signer = wallet.connect(provider);8. Set up the Ethers.js contract
An Ethers.js contract is a representation of the actual contract that has been deployed. This class enables you to interact with your contract using JavaScript. You can send it a transaction; in this case, we will use it to trigger our MintNFT function.
Add these lines of code to mint.js:
const nft = new ethers.Contract( process.env.CONTRACT_ADDRESS, contractInterface, signer);9. Build the main function
Create the main function, which will asynchronously call the MintNFT function passing as arguments:
- Your address (or any other recipient address you chose)
- The
CIDof your NFT’s metadata
We required the confirmation to be 5 blocks:
main function: tx.wait(5)),
Therefore, it will take a few seconds before seeing confirmation in your terminal.
Your mint.js file should now look like this:
require("dotenv").config();require("@nomiclabs/hardhat-ethers");const contract = require("../artifacts/contracts/NFT.sol/NFT.json");const contractInterface = contract.abi;
let provider = ethers.provider;
const tokenCID = "https://bafkreifvtwuiypleu4vv7edh4zclmymp5ixh44xxmd3hb2imiqa7mp2c3a.ipfs.dweb.link/";const privateKey = `0x${process.env.PRIVATE_KEY}`;const wallet = new ethers.Wallet(privateKey);
wallet.provider = provider;const signer = wallet.connect(provider);
const nft = new ethers.Contract(  process.env.CONTRACT_ADDRESS,  contractInterface,  signer);
const main = () => {  console.log("Waiting for 5 blocks to confirm...");  nft    .mintNFT(process.env.PUBLIC_KEY, tokenCID)    .then((tx) => tx.wait(5))    .then((receipt) => console.log(`Confirmed! Your transaction receipt is: ${receipt.transactionHash}`))    .catch((e) => console.log("Something went wrong", e));};
main();
10. Call mint.js
Lastly, run mint.js to deploy your NFT:
npx hardhat run scripts/mint.js --network palm_testnetnpx hardhat run scripts/mint.js --network palm_mainnetWaiting for 5 blocks to confirm...Confirmed! Your transaction receipt is: 0xe97e9d8713f48346b860da9209fc4b5b3c051f574e1389ef25a397a51b2e3f8711. Look up your deployment on the Palm network block explorer
Paste the address in Contract deployed to address: from the previous step into the search bar. It may take 10-20 minutes to appear.
| Testnet | Mainnet | |
|---|---|---|
| Explorer URL | https://explorer.palm-uat.xyz | https://explorer.palm.io |
✅ Your NFT is minted!
Use Your Deployed Contract as an NFT Factory
Note that your deployed contract can act as an NFT factory, enabling you to mint any number of tokens.
View Token in MetaMask
If you want to see your token appear in your MetaMask wallet
- Go to MetaMask
- Paste the address of the contract (located in your
.envfile) in theToken contract addressi.e. the value ofCONTRACT_ADDRESS = 0x3DB7Da7f66a416B1865b699E426fE9e413285BB9 - Add a
Token Symbol - Add
0as a decimal - Click
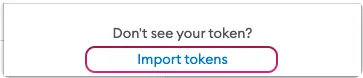
Add Tokens - Click
Import Tokens